Check out this super cute skirt I made!
It's really cute and really comfortable so that makes it perfect for me considering pajamas are my wardrobe of choice. I really pulled out all the stops for these pictures. I even did my hurr so that's a plus.
Now y'all probably think I'm lazy, and you're right, so that should be motivation enough to go out and buy your fabric for this skirt. Cause it must be at least a little easy.
You're going to need a yard of whatever fabric you decide to make the underskirt with. I chose a really thin, white, jersey knit that is also really soft and comfy. If you prefer the feeling of raw, chafed skin, though, you should probably go with something like wool. Or cow hair. Just saying. Moving on.
You will also need a half a yard of each of your 3 colors should you choose to do the stripes. Most jersey knit fabric comes in 60" width, which is pretty necessary for this project, so try to get that. If you choose to do just one color, you'll need a yard and a half of the one fabric.
You'll also need a length of elastic for the waste band.
Oh and coordinating threads for your fabrics.
Umm what else... I guess you'll probably need a sewing machine though you could do it by hand.
Ok let's get started.
1. Take your measurements.
Measure your waist or where you want your skirt to sit, and divide by 2: we'll call this length W
Measure your hips around the widest part of your ghetto booty, and divide by 2: we'll call this length H
Measure the length from H to W: we'll call this L
Measure the length from H to where you want your skirt to hit on your legs, then minus 4" from it: We'll call this Q (cause it's my favorite letter, that's why)
I don't have any pictures of this next part, but it's pretty easy.
2. Make your underskirt/liner
Lay out your chosen fabric/hide so that it is 2 layers thick.
On the top edge make 2 marks that are W length apart.
(Here's the hard math part) Ok so subtract W from H and divide by 2. This is the length that you need to measure out from each W mark. Your 2 new marks should be H length apart. Redo if necessary.
Draw a straight line down from each H mark about 12".
Connect each W mark to the closest line with a length that is H.
It should look like this so far:
(I hope that was clear)
Measure straight down from each intersection and make another mark at Q length.
Ensure that both Q marks are also H length apart. Redo if necessary
By now it will look like this
Cut this out and sew all the way along the long edges.
And that is your simple pencil skirt. Hooray! We made it.
3. Cut out the ruffles
Depending on the length of the skirt, you'll need about 2 full length ruffles of each color, or 6 ruffles total. You'll also need about 2 small ruffles to fill in the bottom
Lay out your fabric so it is 1 layer thick.
Cut each ruffle 5" wide from selvage to selvage, or about 60" long. Then cut off the selvages.
Sew long, loose basting stitches in the top of each strip using a contrasting color thread.
Leave both ends loose so you can gather from each end. It's important to only gather half from each end, like this:
4. Mark your skirt.
Lay the skirt out flat so that the seams are flat on each side.
Measure and mark the left side of the skirt every 4".
Measure and mark the right side of the skirt ever 3".
Note: if you want more dramatic diagonals, mark the right side every 2". You'll have to account for this by adding more filler ruffles at the end.
5. Sew on the ruffles.
a) Lay out and pin:
Keep your skirt laid out flat.
Pin one end of the ruffle right at the first mark down on the right side.
Pin the middle of the ruffle right at the first mark down on the left side.
Gather and adjust until the ruffle lays flat on the skirt, then pin in place.
Flip the whole skirt over and do the same with the other side.
When you get to the other end of the ruffle, pin it slightly above the first side, like this:
It doesn't have to be exact because you mostly won't see it when it's done.
b) Sew on the ruffle:
Using a larger (4mm) zigzag stitch (this is pretty important), sew the ruffle to the skirt.
Switch to a regular straight stitch when back-stitching; I find this works better for me.
c) Remove basting thread:
Unpick the thread you used to gather the ruffle. You'll have to dodge the zigzag stitch, which is why it's helpful to use a bigger stitch.
This is important because now your ruffles will stretch with the skirt and make it even more comfy :)
I chose to do one color at a time so I wouldn't have to change out my thread so often.
Continue to pin and sew, lifting up layers as you go.
Getting the ruffles to lay flat on the underskirt gets harder as you go; just pay close attention and you'll work it out. I have faith in you.
When you get done with all your long layers, you're going to have this triangle of underskirt sticking out. We're gonna cover this with 2 more layers.
If you're striping, figure out which color needs to come next.
Cut a 5" wide and 12" long strip of this color.
Cut a 5" wide and 24" long strip of the next color.
Note: You should double check these lengths; they should be twice as long as they need to be for the gathering.
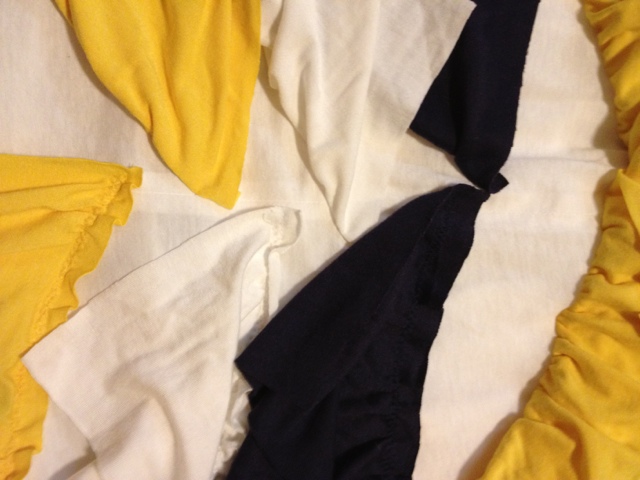
Sew the bottom one on first, pinning the middle about 2" up from the bottom, and the edges right at the previous ruffle, like this:
Do the same with the next layer, making the middle 3" up from the last layer.
6. Sew in the elastic.
Cut a length of elastic that is W minus an inch.
Sew this together like this:
Make a casing for your elastic; the width should be 2 times the width of the elastic plus another inch, and the length should be W.
Sew the elastic into the casing using a 1/4" seam allowance
Place right sides together of the skirt and the elastic casing and sew together using a 1/2" seam allowance.
What should happen is you leave your original seam from sewing the elastic into its casing out of the second seam (attaching it to the skirt) so you can cut if off when your are done.
Which is now!
You're done!!
Hooray!!!
Aren't you just so cute in your new skirt?
Oh and you can use leftover scraps to make super cute headbands or ribbons or bows or something like that.